Applicable Devices
Solis Wi‑Fi Dongle / Data Logger
Serial Number starting with 4 or 7
Compatible with iOS (iPhone) and Android devices
Pre‑Requisites (Important Checks)
Before starting the connection process, ensure the following:
Customer has Wi‑Fi network name (SSID) and password available
Wi‑Fi password must NOT contain special characters or symbols such as:
< . , ! ? @ # $ % “ ‘ - _ >Wi‑Fi router must operate on 2.4 GHz frequency (5 GHz is not supported)
Mobile phone battery is sufficiently charged
Phone is taken close to the inverter during setup
Step‑by‑Step Connection Process
Step 1: Disable Mobile Data
Mobile data must be turned OFF to avoid interruption during setup.
iPhone: Settings → Mobile → Mobile Data → OFF
Android: Settings → Connections → Data Usage → Mobile Data → OFF
Step 2: Forget Existing Home Wi‑Fi Network
Go to Settings → Wi‑Fi
Select the customer’s home Wi‑Fi
Tap Forget this Network (not just Disconnect)
⚠️ Ensure the Wi‑Fi password is known before proceeding.
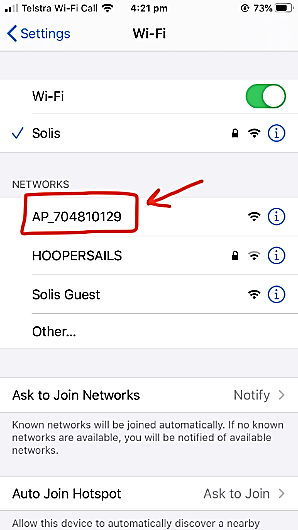
Step 3: Connect to Solis Logger Wi‑Fi (AP Mode)
Open Wi‑Fi settings on the phone
Look for a network named:
AP_XXXXXXXXX
The number (XXXXXXXXX) will match the serial number of the Wi‑Fi logger
Tap to connect
ℹ️ This network may show as “Unsecured” or “No Internet” – this is normal
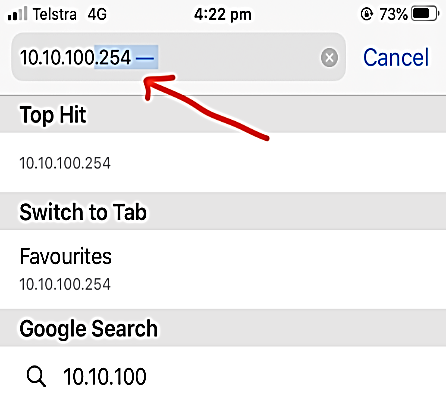
Step 4: Access Logger Configuration Page
Open Safari or Google Chrome
Enter the following IP address in the address bar:
10.10.100.254
Press Go / Enter
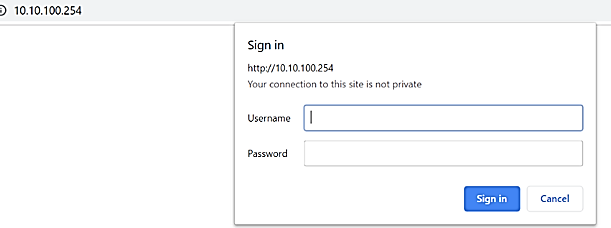
Step 5: Login to Logger Interface
When prompted, enter the following credentials:
Username: admin
Password: admin
Tap Sign In
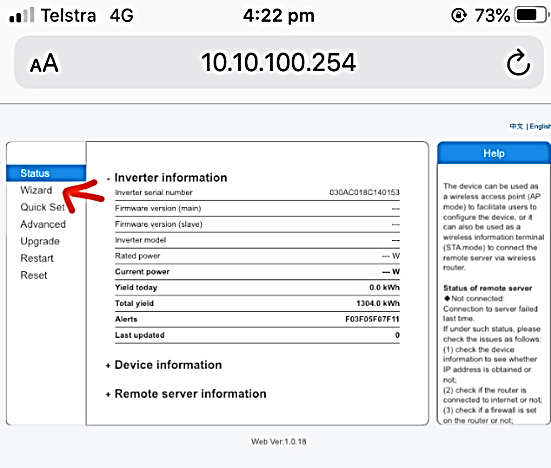
Step 6: Open Wi‑Fi Setup Wizard
On the main page, tap WIZARD (second option from the top‑left corner)
Step 7: Select Home Wi‑Fi Network
A list of available Wi‑Fi networks will appear
Select the customer’s home Wi‑Fi network
Check the RSSI value (signal strength)
✅ RSSI must be greater than 30% for stable communication
Tap Next
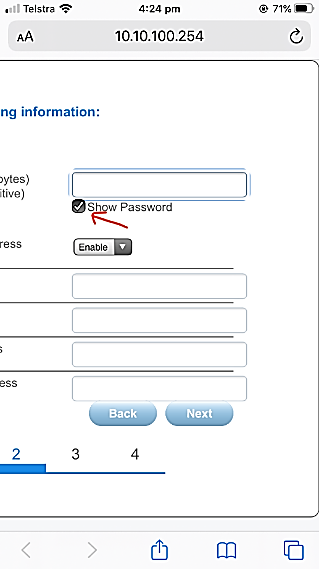
Step 8: Enter Wi‑Fi Password
Enter the password for the selected home Wi‑Fi network
Tap Show Password to verify accuracy
Do not change any other settings
Tap Next
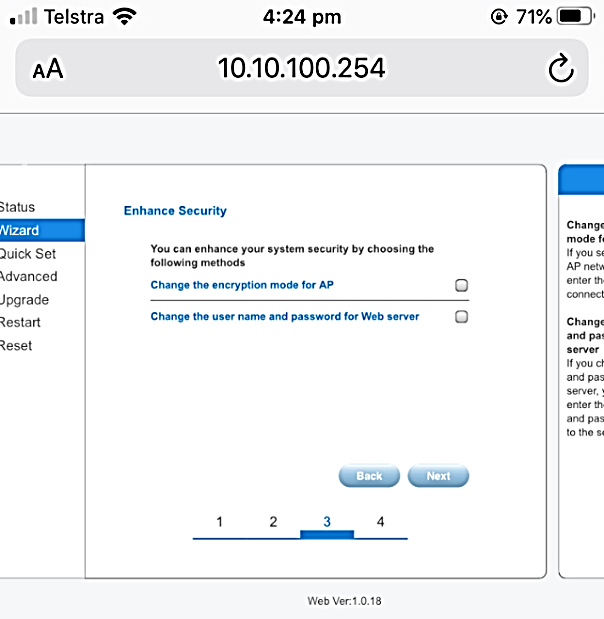
Step 9: Enhance Security Screen
An Enhance Security page will appear
No changes are required on this screen
Tap Next
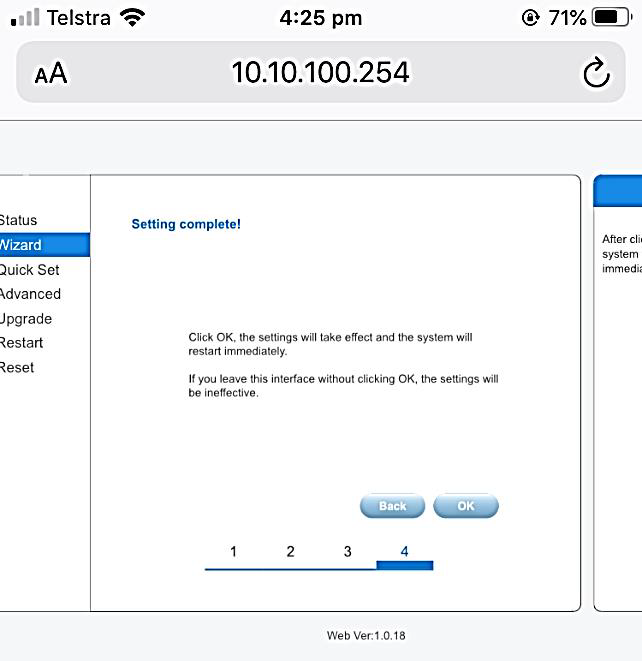
Step 10: Complete Setup
You will see a “Setting Complete” screen
Tap OK
⚠️ This step is mandatory. If OK is not clicked, the configuration will not be saved.
Wait 10–20 seconds after pressing OK
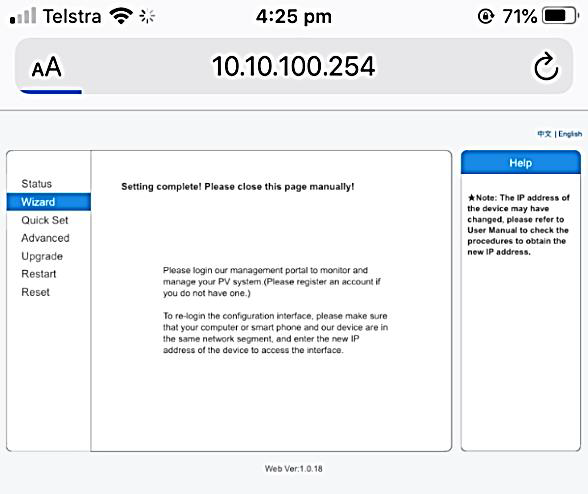
Step 11: Close Browser Manually
After setup, a message will appear:
“Settings complete! Please close this page manually!”
Close the browser tab manually
Step 12: Power Cycle Phone Wi‑Fi
Turn OFF Wi‑Fi on the phone
Wait 3–5 minutes
Then turn Wi‑Fi ON again
Verification Checklist (After 5 Minutes)
Confirm the following:
AP_XXXXXXXXX should NOT be visible in Wi‑Fi list
Phone should automatically reconnect to home Wi‑Fi
If AP_XXXXXXXXX is still visible or connected:
Setup was not successful
Recheck Wi‑Fi password
Confirm router is 2.4 GHz only
Repeat the setup process from Step 1
SolisCloud Monitoring Setup
After successful logger connection:
Create a monitoring account via:
SolisCloud mobile app, or
SolisCloud web portal
Refer to the “SolisCloud Customer Monitoring Account Setup” guide
Add the plant and register the inverter/logger
Common Issues & Notes
❌ 5 GHz Wi‑Fi is not supported
❌ Special characters in Wi‑Fi password may cause failure
✅ Keep phone close to inverter during setup
✅ Ensure stable signal strength (RSSI > 30%)
Was this article helpful?
That’s Great!
Thank you for your feedback
Sorry! We couldn't be helpful
Thank you for your feedback
Feedback sent
We appreciate your effort and will try to fix the article